|
|
|
|
|
|
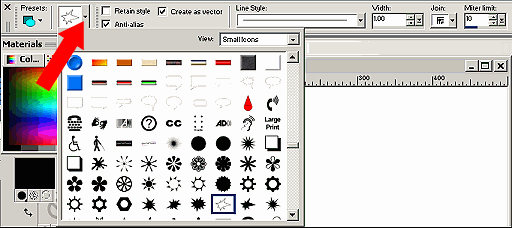
Let's show you how to make some fun shapes in PSP 8, kind of like those Spirograph drawings we did as kids? Ron Lacey came up with this idea, and we played with it non-stop. Hope you have as much funs as we did! 1. Start by opening a new image - 500x500 pixels. Any colour background will work, it really doesn't matter! 2. Select the Preset Shape tool
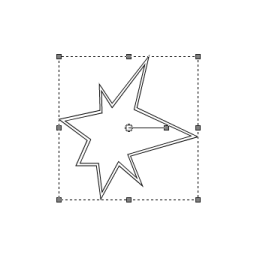
3. Set the Tool Options to Anti-alias, Create as Vector. Uncheck Retain style. The Line Style should be solid, and the Width 1.00. Set the foreground material to Black and the background material to Null. 4. Drag out a shape on the image you created. Don't worry about positioning it. Leaving it a bit "lop-sided" will give you a better end result! Because we've created this shape as a vector object, it's automatically selected when we finish dragging it out.
5. Click on the Pen tool
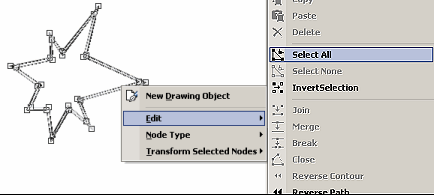
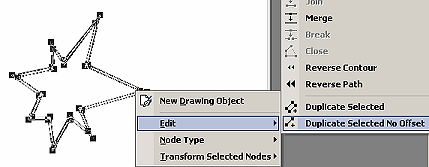
6. Go to Objects>Align>Center in Canvas. This will position the shape in the center of the canvas. 7. Now that we have the nodes selected, we can use features of the Pen tool to create our spiro effect, as well as the right-click context menu features. Right click on any of the nodes or lines in the shape on the canvas. You'll see the context menu for the Pen tool.
8. Choose the Edit mode>Select All. This will select all the vector nodes in the object, so that any action will take will be applied equally to all nodes. The nodes will turn black when selected. 9. Right click again on the object, to access the Edit mode again, this time choosing Duplicate Selected No Offset. This will create exact duplicates of the selected nodes, in the same position as the original nodes.
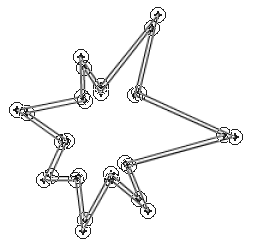
10. The duplicated nodes will be indicated by a circle and a plus sign where the original node square indicators where. This is your clue - HEY - there's something else here!
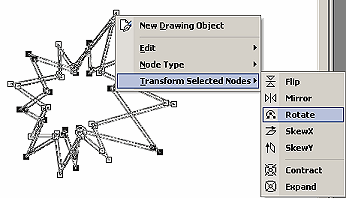
11. Now let's turn to the Pen tool
12. Right click on any node again, this time choosing Transform Selected Nodes>Rotate. You will see the duplicated nodes rotate clockwise 30 degrees from the original position, around its center.
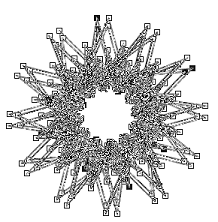
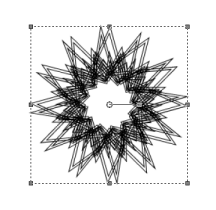
13. With the nodes still selected, perform this combination of right click>Edit>Duplicate Selected No Offset and then right click>Transform Selected Nodes>Rotate 11 more times, to rotate the duplicated nodes 360 degrees. More nodes will be added each time you duplicate nodes, so you can quickly build up a complex object. This can also be rather power hungry, so if you started with a complicated shape in the first place, you might need to rethink that!
14. When you've completed the
duplication/rotate process so that your object has now assumed
the completed spiro shape, click on the Object Selection tool
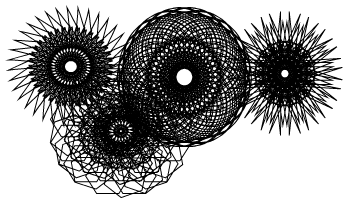
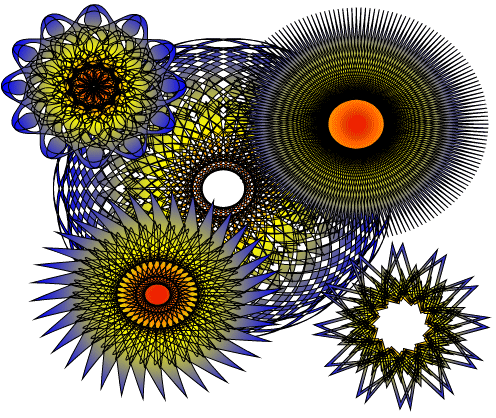
15. Go to File>Export>Shape. Name your spiro shape, and save it as a Preset Shape that you can re-use! Here's some examples using a sunburst gradient fill on several different spiro styles. You can layer them too. (One note of caution - these can be very power-hungry, since they contain a lot of vector nodes. You may find a bit of a wait while processing these!)
© Sally Beacham and Dizteq.com 1999-2002 |
|
|
|
|
|
|
|
|
|
|
|
|
|
|
|
|
|
|
|
|
|
|
|
|
|
|
|
|